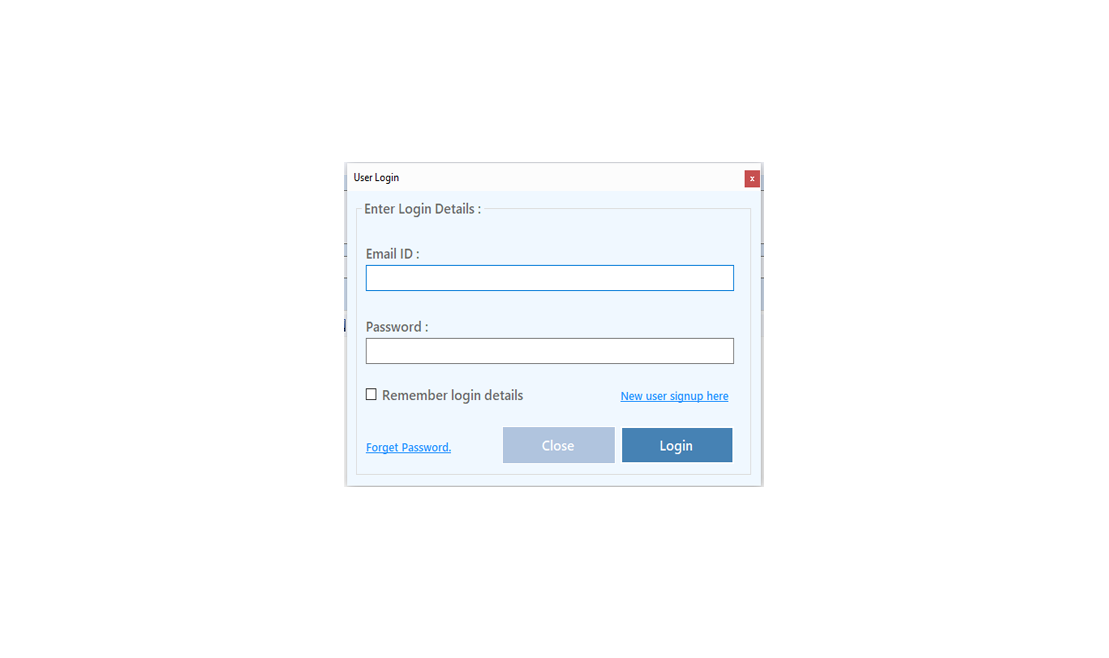
To Improve user Experience and Security we Introduce Signup and login Feature in our Software.
Step 1: Sighup
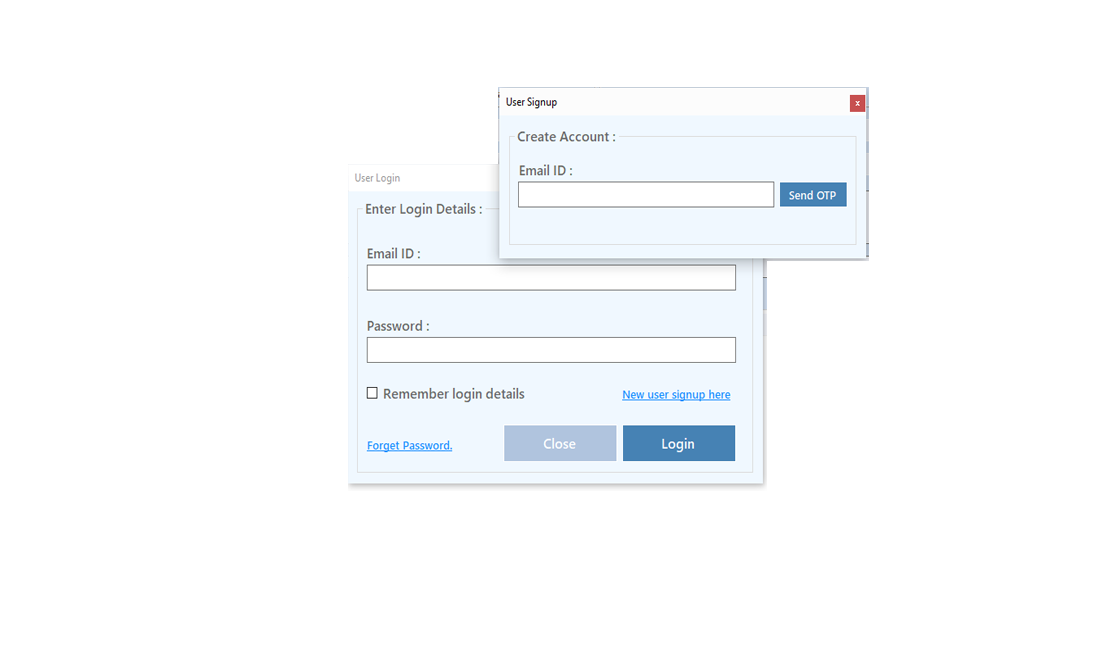
Click on New User Signup Link
Enter your Email and click on Send OTP Button
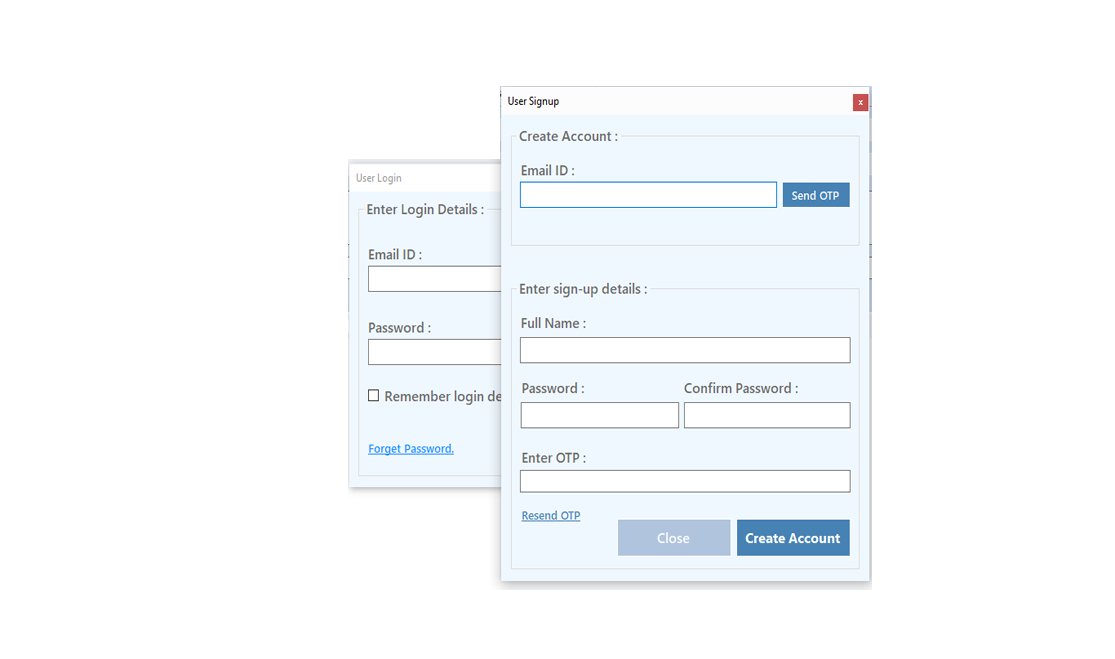
Enter OTP and Fill Details then click onCreate Account Button
Step 2: Login Your Account

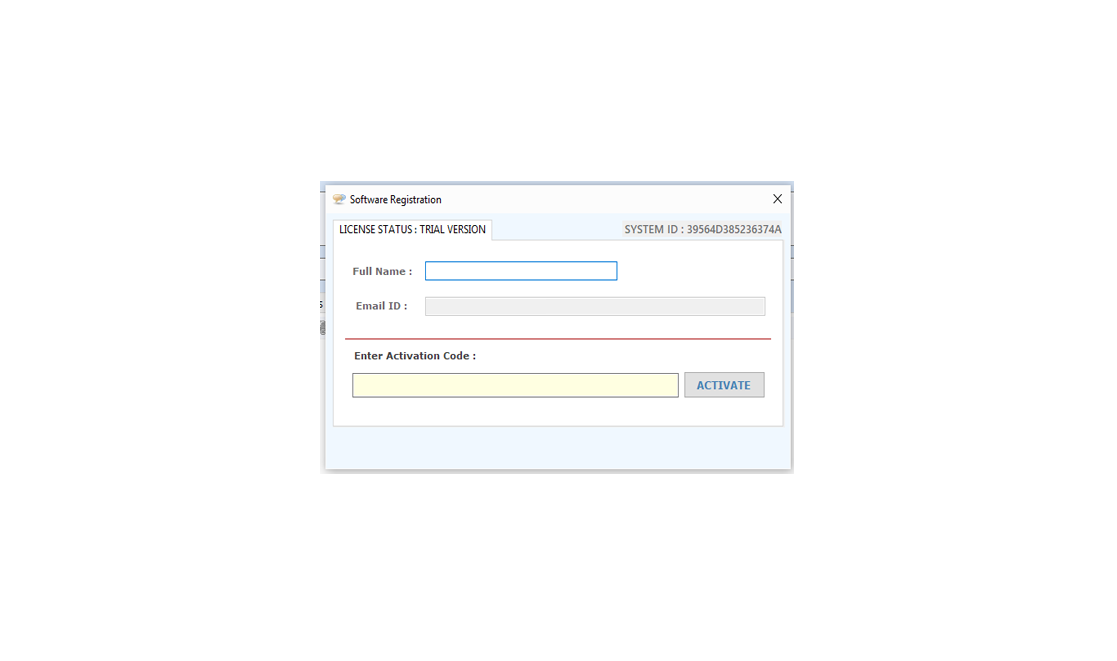
After Login you can Activate your license. The License will Assigned on the Email and always will work with that email.You can't assign license to other email after activation.
Step 1: Visit Help Menu and Select Activate
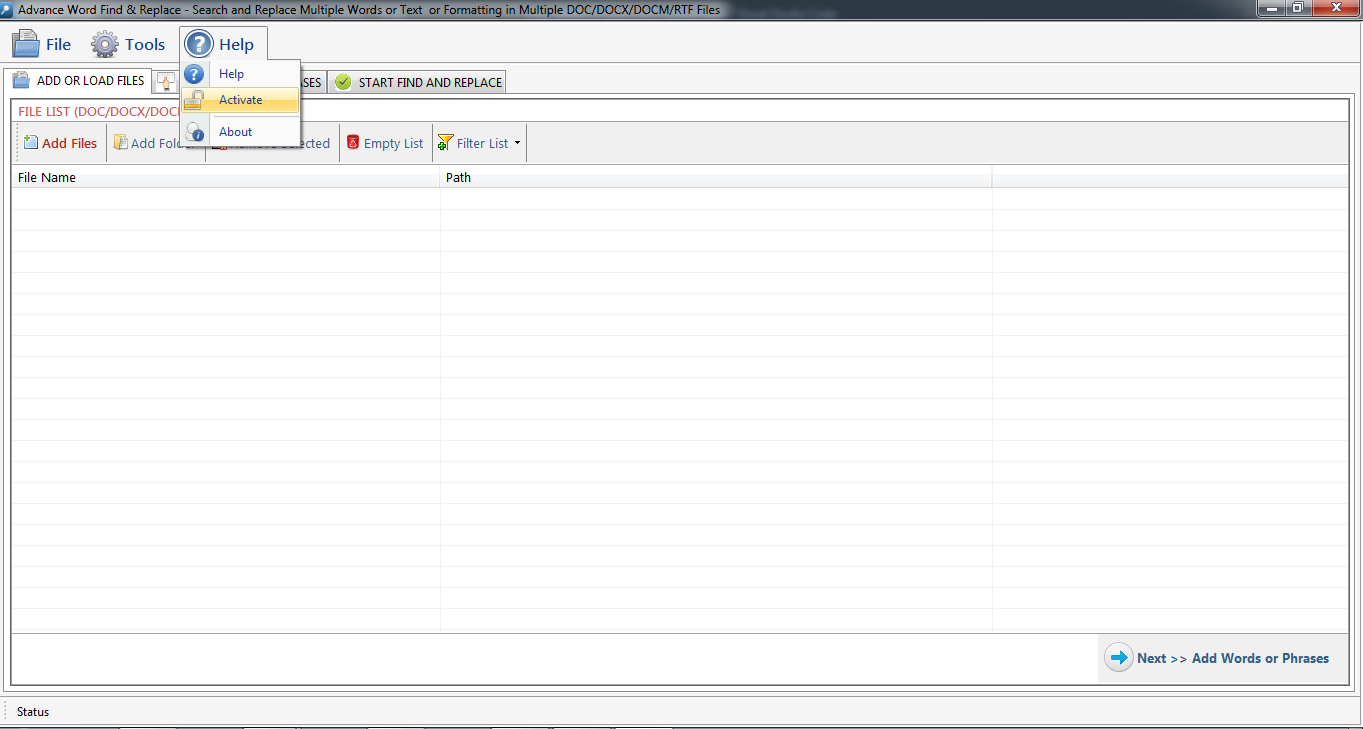
Step 2: Enter the License Key then Click on Activate Button
Advance Line Count is an easy to use line count tool, you can go through this help manual and learn how you can use Advance Line Count..

Add Files -Click on "Add Files" button to open file dialog box select files you want to add, you can select multiple files of different formats supported by LCM.
Add Folder - Click on "Add Folders" button to open folder dialog box select folders you want to add and press ok after that a "Search Load Files" Screen appears see fig 1.1.

Fig 1.1
Click on "Change Folder" button if you want to select different folder. If you want to search and load all supported files select "All Supported Files" or if you want to search and load only Word Files or Excel Files turn both option on after that checked "Only Native Directory" if you wish to load files from only the top directory not from its sub directories and their sub directories, finally press Load to load files in All Files List..
Delete Selected : You can remove the selected files from the file list, to select multiple files in file list use Ctrl or Shift key. You can also remove files by pressing CTRL+DEL key from Keyboard.
Empty List : You can remove all files from the file list, it will alert you before removing all files

Setting : Press Setting button to Open "Report Option". See Fig. 1.3

Fig 1.3

Fig. 1.4
Final Statistics: You can see Final Statistics below. It has 3 Sections, See Fig. 1.5

Fig. 1.5
Final Statistics For All Files:You can see Final Statistics for All Files in 1st Section If You press "Word Files" above in the file list you will see the Final Statistics for Word Files Only. You can Export these Statistics as TXT/DOC/HTM Files by clicking on Export Statistics button. Text Analyzed is the 2nd section in which you can define which section of a Word files you can count e.g. if you want to include Comments and Header/Footer in counting just checked on the Header, Footer and Comments checkboxes.
General Setting: It is the 3rd Section of the Final Statistics you can off the Auto Count Command by unchecked the same and similarly the other options.
Export Statistics:You can export the Final Statiscs of All Files/Word Files/Excel Files etc.. to a Text, Word or Html Files by clicking on "Export Statistics" button. See Fig. 1.6 & 1.7

Fig. 1.6

Fig. 1.7
Export Report: You can Generate and Export the Final Processed Files to Excel and Word. See Fig. 1.8 & 1.9

Fig. 1.8

Fig. 1.9
Go to Help Menu. Now click on Transfer License option.
Step 1 : Deactivate from current PC.
Step 2 : Install the software on new PC and Register it with same Activation Key.


Copyright © LantechSoft | info@lantechsoft.com
